Image
inlay innovation

What is an RFID inlay?

An RFID inlay is a component of radio-frequency identification (RFID) technology. It consists of an RFID chip (also known as an integrated circuit or IC) attached to an antenna, typically embedded in a substrate material such as plastic or paper. The chip and antenna together form the core of an RFID tag, which is used for identifying and tracking objects, people, or animals remotely through radio waves.

RFID inlays come in various shapes and sizes depending on their intended application. They are commonly used in products such as RFID labels, stickers, cards, and tickets. The inlay is typically embedded within or attached to the item being tracked or identified.

RFID inlays find applications in a wide range of industries, including retail, logistics, transportation, healthcare, and manufacturing, where tracking and identification of assets, products, or individuals are required.

What is the difference between wet and dry RFID inlays?

Wet and dry RFID inlays refer to two different manufacturing processes for producing RFID tags, specifically focusing on the adhesives used during production.

Wet RFID inlays are created by directly embedding the RFID chip and antenna onto a carrier substrate (usually a backing material such as plastic or paper) using an adhesive.

Dry RFID inlays involve a different process where the RFID chip and antenna are first assembled onto a carrier substrate, and then a dry adhesive layer is applied over them.

In terms of functionality and application, there isn't typically a significant difference between wet and dry RFID inlays. Both types serve the same purpose of providing the core components for RFID tags, allowing for identification and tracking of objects, people, or animals through radio waves. The choice between wet and dry inlays often depends on factors such as manufacturing processes, cost considerations, and specific application requirements.


Explore RFID Inlay Tags

Inlay Innovation Celebrates Third Year Anniversary

Inlay Innovation Celebrates Third Year Anniversary

To celebrate Inlay Innovation's third year anniversary, we interviewed two member-owners about their experiences with our brand.

Read Blog

Top Questions About RFID

Beyond RFID Tags: Top Questions About RFID Technology

We answer your top questions about RFID technology, including its definition, inventory management and cost.

Read Blog

Demystify the RFID Inlay Manufacturing Process: From Concept to Card

Demystifying the RFID Inlay Manufacturing Process: From Concept to Card

Want to know how an RFID inlay is created? This article breaks down the process from designing to the finished product.

Read Blog

Inlay Innovation

For more than 72 years, Metalcraft has provided customers worldwide with durable, high-quality barcode labels and RFID tags.

But did you know that we also manufacture custom RFID inlays? Watch this video to learn more about our latest business venture, Inlay Innovation and how an inlay is created.

This process includes the design, development and manufacturing of custom RFID inlays.

With Inlay Innovation, we offer a 360° approach to RFID construction. We design everything but the chip in-house, ensuring that every component of your RFID tag fits together perfectly. Because they're chip agnostic, our custom designs can fit any chip that you need.

We understand how everything fits together, from the big picture to the fine details. That is how we can create custom inlays tailored to your application, offering enhanced tag performance and efficiency. We can find that "one in a million" custom design, often in less time than other companies would take to find you a good stock design.

The services and capabilities of Inlay Innovation include the following:

  • Shear testing the bond strength of the conductive adhesive of the chip and antenna
  • Temperature exposure tests
  • Inlay design services
  • Contract converting services
  • Prototyping


So, what exactly is an RFID inlay? An RFID inlay consists of three separate components.

  1. Antenna
  2. Chip
  3. Substrate


The RFID antenna serves as the "ears" of the tag, allowing it to track and "catch" RF signals being emitted from an RFID reader.

The RFID chip is the part of the inlay that makes decisions while also providing the memory needed to store data.

A substrate is the part of an RFID tag that holds the components together. It's usually made from a flexible material such as thin plastic, but more rigid materials can be used as well. The chip is bonded to the antenna on the substrate in order to make the completed inlay.

Why Inlay Innovation Could Be Right for You

Partner with us to save time, money: For some RFID applications, constructing a custom inlay is a cost-effective way to optimize your RFID tags and achieve the desired outcome of your RFID application. Custom inlays save time and capital by combining the engineering phase of tag construction with the design phase. By partnering with the RFID experts at Inlay Innovation, you can expect to go from tag design to final production in 12 months.

Differentiate from the competition: Custom inlays allow customers to better differentiate their products by offering a truly unique product and creating a more sustainable supply chain.

360° RFID solution provider: Beyond custom designs, we are committed to being your full-service RFID partner. Our identification experts will help you every step of the way, from the initial design of your tag through the manufacturing process.

Designed and manufactured in the USA: We offer US-based designs and manufacturing with a sustainable supply chain that will not disrupt you or your customers. From prototypes to production runs, Metalcraft can confidently meet customers' RFID identification challenges.

High Tech with a Personal Touch

Inlay Innovation offers world-class inlay manufacturing and testing capabilities, as well as the technical expertise that rivals those of any larger organization in the RFID industry. But we offer something those larger companies don't - service with a personal touch. We genuinely listen to our customers and are invested in their successes - which shows in our excitement as we continually communicate through every project and make it easy to do business with us. 

Our inlay design consultants work with you, reviewing specifications and defining objectives to develop custom inlay designs for specific applications. We delight in giving customers the flexibility, ease of use and technical solutions they need to meet ID demands not only today but into the future. This level of service and support is there for you always, genuinely defining ID Made Better®.

If you have an opportunity for custom RFID inlays, contact us at 800-437-5283. You can also visit us at www.idplate.com.

Request a quote

More RFID Inlays Videos See All

Inlay Innovation

For more than 72 years, Metalcraft has provided customers worldwide with durable, high-quality barcode labels and RFID tags.

But did you know that we also manufacture custom RFID inlays? Watch this video to learn more about our latest business venture, Inlay Innovation and how an inlay is created.

This process includes the design, development and manufacturing of custom RFID inlays.

With Inlay Innovation, we offer a 360° approach to RFID construction. We design everything but the chip in-house, ensuring that every component of your RFID tag fits together perfectly. Because they're chip agnostic, our custom designs can fit any chip that you need.

We understand how everything fits together, from the big picture to the fine details. That is how we can create custom inlays tailored to your application, offering enhanced tag performance and efficiency. We can find that "one in a million" custom design, often in less time than other companies would take to find you a good stock design.

The services and capabilities of Inlay Innovation include the following:

  • Shear testing the bond strength of the conductive adhesive of the chip and antenna
  • Temperature exposure tests
  • Inlay design services
  • Contract converting services
  • Prototyping


So, what exactly is an RFID inlay? An RFID inlay consists of three separate components.

  1. Antenna
  2. Chip
  3. Substrate


The RFID antenna serves as the "ears" of the tag, allowing it to track and "catch" RF signals being emitted from an RFID reader.

The RFID chip is the part of the inlay that makes decisions while also providing the memory needed to store data.

A substrate is the part of an RFID tag that holds the components together. It's usually made from a flexible material such as thin plastic, but more rigid materials can be used as well. The chip is bonded to the antenna on the substrate in order to make the completed inlay.

Why Inlay Innovation Could Be Right for You

Partner with us to save time, money: For some RFID applications, constructing a custom inlay is a cost-effective way to optimize your RFID tags and achieve the desired outcome of your RFID application. Custom inlays save time and capital by combining the engineering phase of tag construction with the design phase. By partnering with the RFID experts at Inlay Innovation, you can expect to go from tag design to final production in 12 months.

Differentiate from the competition: Custom inlays allow customers to better differentiate their products by offering a truly unique product and creating a more sustainable supply chain.

360° RFID solution provider: Beyond custom designs, we are committed to being your full-service RFID partner. Our identification experts will help you every step of the way, from the initial design of your tag through the manufacturing process.

Designed and manufactured in the USA: We offer US-based designs and manufacturing with a sustainable supply chain that will not disrupt you or your customers. From prototypes to production runs, Metalcraft can confidently meet customers' RFID identification challenges.

High Tech with a Personal Touch

Inlay Innovation offers world-class inlay manufacturing and testing capabilities, as well as the technical expertise that rivals those of any larger organization in the RFID industry. But we offer something those larger companies don't - service with a personal touch. We genuinely listen to our customers and are invested in their successes - which shows in our excitement as we continually communicate through every project and make it easy to do business with us. 

Our inlay design consultants work with you, reviewing specifications and defining objectives to develop custom inlay designs for specific applications. We delight in giving customers the flexibility, ease of use and technical solutions they need to meet ID demands not only today but into the future. This level of service and support is there for you always, genuinely defining ID Made Better®.

If you have an opportunity for custom RFID inlays, contact us at 800-437-5283. You can also visit us at www.idplate.com.

What is RFID Frequency and Why It's Important

There isn't a one size fits all when it comes to frequency within RFID. One tag can work well in one country but not another. Rest assured, there are solutions to finding the best tag for you! If you're not sure whether or not your RFID tag will work the same in every part of the world, then this is the video for you!

Frequency is the pitch at which RF waves operate. This is an important thing that needs to be both recognized and limited, otherwise the interference would cause poor performance on RF devices out in the world.

In RFID, frequency bands are typically measured in megahertz (MHz). The two most common of these are HF or high frequency and UHF, or ultra high frequency.

For the RFID space, UHF has a frequency of 860-960 MHz. Different countries use different frequency windows in order to read their RFID tags. This can get complicated or confusing, but there are two main things that you'll need to remember. These include the FCC band and the Etsy band.

The FCC band is used in the United States and it has a smaller range of 902 to 928 MHz. The Etsy band, which is typically used in European countries, It has a smaller frequency window of 865.6 to 867.6. 

So, does this mean that certain tags only work in certain countries? The answer to this is both yes and no. Most passive UHF tags are designed to work in the global frequency range, which is 860-960 MHz. What this means is that the performance and the read range might vary from country to country based on what tag you're using.

There's a lot to explain about RFID, but that's why Colynn's here making RFID content in order to make it simple. He also encourages watchers to leave comments below on what other RFID concepts they would like to be made simple.

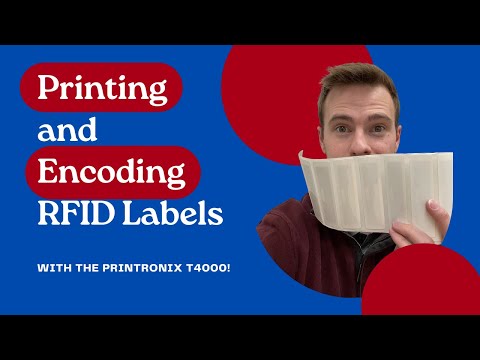
Printing and Encoding RFID Labels on the Printronix T4000

Check out how the TSC Printronix RFID Subject Matter Expert demonstrates how to:

- Setup a label on Bartender label software

- Print a barcode and human-readable

- Encode the data to the RFID Inlay The T4000 from Printronix Auto ID prints and encodes RFID labels with incredible speed and accuracy.

The expert starts on the Bartender app and opens up the wizard for it. From there, he selects the correct printer and puts in the proper label dimensions.

Before he does anything else, the expert puts a printable object on the label and performs a print test.

Next, he selects an RFID object and uses EPC Gen 2 and the Bartender basic data values as his default. From there he sets up the final number for it to serialize so that he can demonstrate the printer printing and encoding.

The next step is checking whether or not you really encoded the labels. There are a couple of ways that you can do this. One way that you can do this involves using an external RFID reader in order to verify the encodings on your labels. In a pinch, you can also use the radio in the printer in order to verify the encoding.

The first thing that you'll need to do is pause the printer's online functionality with the green pause button and then go to settings. From there you will scroll up/down until you can select RFID. After that, scroll down to diagnostics and click on read tag.

Once you're on read tag, you'll scroll to the right and there will be a lightning bolt to start that read tag function. Then you'll want to have the tag under the printer's encoding antenna. After that, you'll press enter on the printer in order to do the read tag function. The printer will have a green notification afterwards to alert you that the validation is completed.

To discover more about this printing and encoding process, check out Colynn's video today!


Request Free Samples for All Your Asset Tracking Needs

How to Calibrate the Sato CL4NX Plus

Watch as RFID Business Development Director Colynn Black goes into detail on how to SIMPLY calibrate the Sato CL4NX Plus thermal transfer printer. He calibrates the media and the RFID tags with the optimized settings using the RF Analyze feature.

Each printer has its own unique features. Whether it's the ease of use of the Sato CL4NX Plus, the precision of the Printronix T4000 or the popular Zebra ZT410. These printers can all get the job done, but they're not very useful if you don't know how to use them. In this video, Colynn focuses on the Sato CL4NX Plus.

The first step to calibration involves preparing the media. This means that you're going to need to sense the liner of the media. To do this, open up the print head and remove a few labels off of the media. Doing this will let the printer "train itself" so that it can know where the liner is. Next, you back up the media so that the liner is underneath the sensor.

To find your calibration settings, you'll need to go to your settings and then the printing section. Inside of this menu you'll scroll all the way down until you get to the advanced setting and click enter. The first setting on this menu will be calibrate, and that's the one that you're going to want to select. Options will include Gap + I-Mark, Gap and I-Mark. For this tutorial, Colynn picks the first one in order to cover all of the bases.

In a matter of seconds after telling it to calibrate, the calibration will be complete. When you go to the main menu and press the "feed" button, you'll be able to tell that your media has been calibrated.

You can also calibrate your RFID settings using the Sato RF Analyze feature. To do this, start at the main menu and then go to your settings and click on the interface button. In this section there will be an RFID table that you'll want to select. Changing the antenna position is an option here, with the normal antenna position being good for off-metal tags and the front antenna position being good for on-metal ones.

After the antenna selection there will be options for both the write power and the read power. There are guidelines for this on the Sato website. Colynn selects Sato RF Analyze, uses the Quick search level and presses start. From here it'll optimize to the best print settings or tell you to change the read/write power until it's good to go.

Stay tuned over the next couple of weeks as he goes through the same process using the Printronix T4000 and the Zebra ZT410!

Contact Colynn on LinkedIn at https://www.linkedin.com/in/colynn-bl...

Purchase RFID Tags at https://www.idplate.com/

Request free samples for all your asset tracking needs